
Does your laptop get overheated on a regular basis? Even if don’t use heavy apps still your laptop get heated? We will change the System cooling policy in Windows 10 settings and fix this problem. If this is the case then this step by step fix is for you.
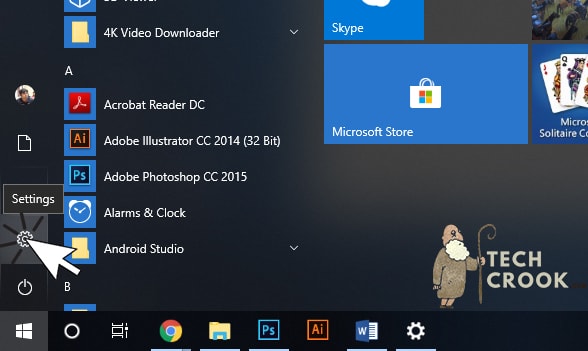
Step I – Go to start and click settings.
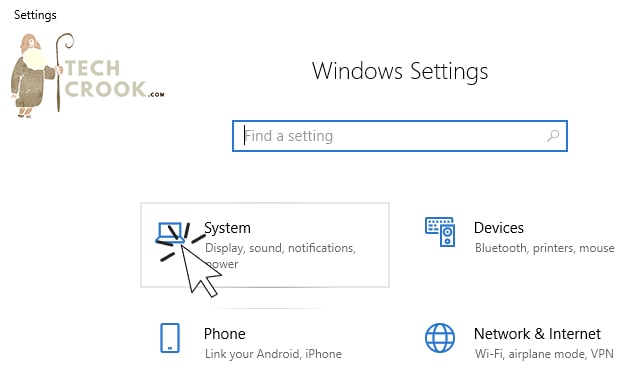
Step II – Choose System from the Menu.
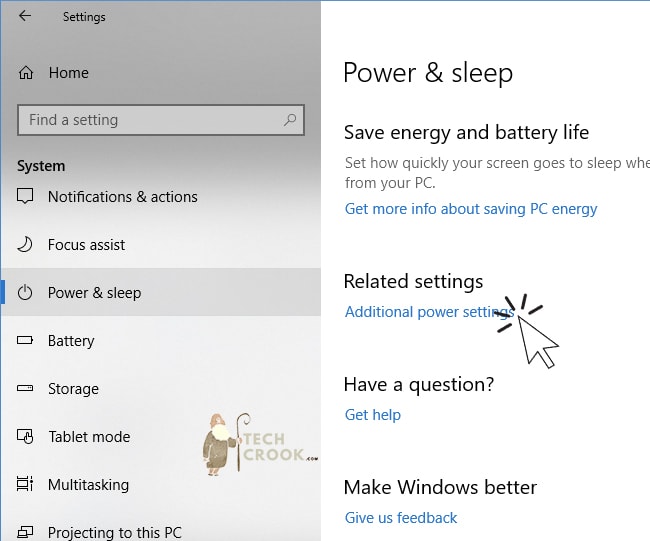
Step III – Click Power & Sleep from the left menu and from Related Settings, click Additional Power Settings.
Step IV – Click on Change Plan Settings, and change brightness to the minimum possible.

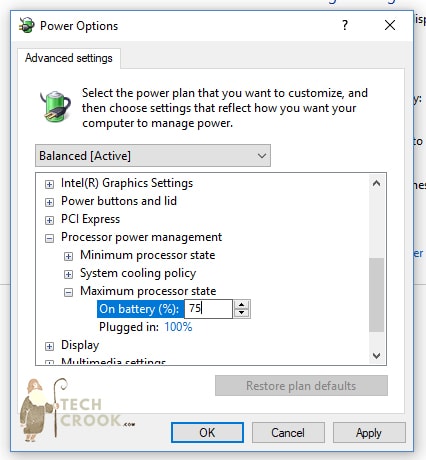
Step V – Click Change Advanced power settings and “+” icon in front of Click Processor power management and change Maximum processor rate to 75%.
Step VI – Now move to System cooling policy and change both to the Active.
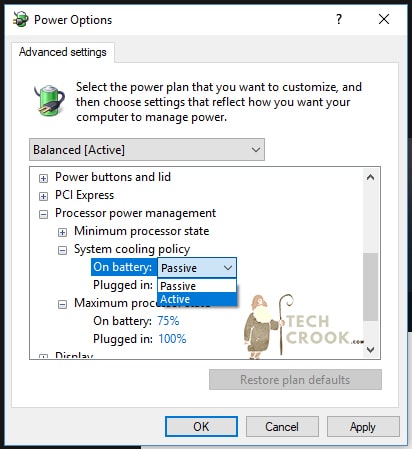
Click Apply and close the popup with OK.
That’s it!
Still facing some problem doing this, here is step-by-step video for you –


1 thought on “Windows 10 Laptop Overheating Problem fix”
Comments are closed.