Many people don’t know about this trick. You can hide your local disk drives in Microsoft Windows 7/8/10 with command prompt aka cmd. The steps are very easy and it takes less than 3 minutes to do that. Just follow our step-by-step guide and in the end, your local disk drive will be hidden.
I bet there is a tonne of things that you don’t know about Windows. You can find some great tricks in our Fun with Windows section. Something like how to limit the internet speed of others and increase yours with cmd or how to create a one-line virus to hang windows PC just with notepad.
Follow these steps to hide local disk drive in Windows
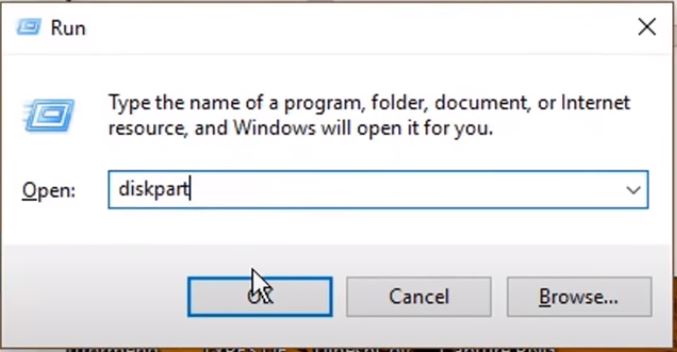
Step I – Click Win + R this will open Windows Run.
Step II – Enter diskpart and click Enter.
Step III – Now type list volume and click Enter. It will show you all of your disks available in your system.
Step IV – Let us assume you want to hide disk drive E from the system. Now type Select Volume E and click Enter.
Step V – Now type Remove Letter E and click Enter to whoosh it out.
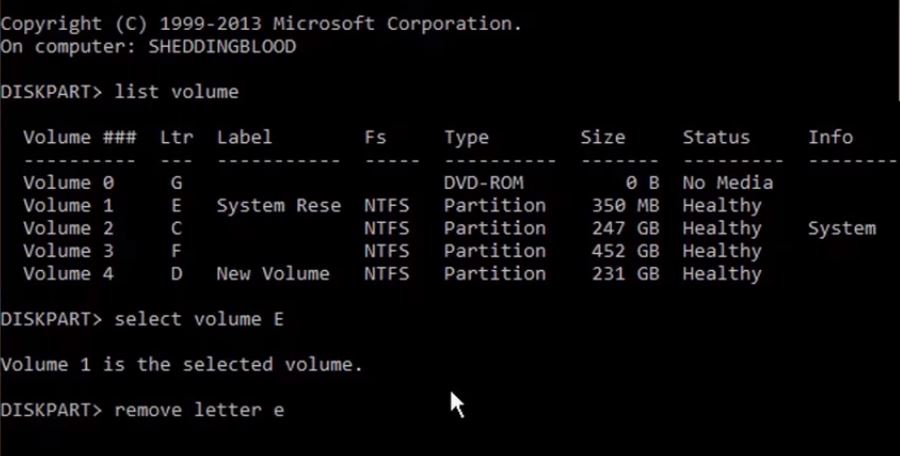
As soon as you write the Remove letter E command in cmd the D drive will be whooshed out and it’s hidden. You can learn more about diskpart in Microsoft’s official documents.
You can also password protect a folder with cmd using Windows.
Wait!! Don’t you want to know how to roll it back?
How to unhide local disk drives in a Windows PC
Follow the above four steps from I – IV and then follow the step below:
Step VI – Type Assign Letter E and click Enter. This will unhide the local disk drive E that you had hidden earlier.
Please note make sure you do remember the drive you hidden.
You can also watch this video for step-by-step guide for the same –